Monday, February 18, 2008

Getting Ready For The Prom

John has a theory: put a little red lipstick and some fancy shoes on a girl and she's bound to turn a few heads! We've made some major changes recently on the truck...our "a little here, a little there" has really started to add up. We haven't posted as often, since we had to send some of our work out to the experts...


For example, the seat has been transformed from the happy spider hunting grounds and former rat motel into a thing of beauty. With all new canvas, burlap, foam, 4 springs repaired (those rats must have been frisky), a new mounting bracket, and lots of red faux ostrich leather, this baby may be the prettiest thing in or on the truck...


...With the exception of these little beauties. Here, John pampers his newly mounted white walls with a bubble bath. Actually, he was scrubbing off the blue protective covering from the white walls. I don't think the rims were back from the powder coaters for 5 minutes before he took them to have the tires mounted. And don't EVEN ask how long they were home from the tire shop before we were out jacking up the truck to put them on...


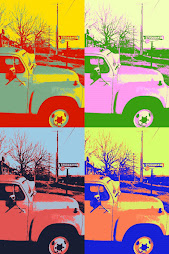
While we waited for the big pieces to get worked on, we did some detail work on the dash. John completely disassembled and cleaned the radio, then went to work with the red paint to add some pizazz. There's still some work to do, but it's coming along. This picture and the next one give an impression of a sleazy night club...the "Stutius" license plate in the background doubles as a neon sign! For those who think it looks a little too much like a sleazy night club, please consider where Tracy and John met....we're going for nostalgia, here!

Thursday, February 14, 2008

Love-Hate Relationship

While John has found many things to love about our old truck, the after-market rear-view mirror was NOT one of those things. You could say, in a sense, that removing it became a little bit of an obsession for him. Not the mirror, itself. Oh no. THAT came off quickly and efficiently and was added to the "old parts" pile in our garage. It was that tiny little metallic piece glued to the windshield that held the mirror on that became John's personal nemesis. The piece called the rearview mirror "button." Oh, make no mistake...there was nothing "cute as a button" about this little chunk of metal. It clung to the glass with the tenacity borne from years/decades/eons of unknown chemical compounds having been baked by the sun. In a nutshell, this baby wasn't moving. We were going to have to get creative.

John diligently searched for the proper removal method. Preferably one that did not involve breaking the glass. Some suggestions: hold a blowtorch to the metal until it was hot enough to melt the adhesive behind it; use a fine wire to try to slip between the button and the glass, effectively "sawing" it off; pry it off with a sharp, flat metal object... There were countless ways to try, but nothing was working. Each time John looked at the truck, that little button seemed to wink at him, as in assurance that it was here (as an eyesore) to stay. Well, when the going gets tough, the tough turn to...what else? The internet. Within minutes, we found what has appeared to have actually worked for several people: Sit the truck out in the sun to heat it up, then use a crescent wrench to twist off the offending piece. It seemed too simple. Being that it was nighttime and darned cold outside, we assisted the heating process with Tracy's hair dryer. The poor appliance, unused to such treatment, promptly popped the breaker and threw out the electricity to the garage. A few flipped switches later and we were back in business with the space heater as our radiant heat source. We twisted with vigor, but with no luck. 5 minutes. 10 minutes. It was a full 25 minutes later that John had it....success! And the window was still intact!

With the help of some adhesive remover and some serious scrubbing, the windshield is back to looking like it should...clear, clean, and mirror-free.

Thursday, February 7, 2008

You would think they would have put the color name on the can!

Examine this can closely. Can you find where it says what color paint is inside? John has been looking for days without any success. It might have helped to have kept that color-coded lid he threw away...


There was that one spot in the corner. No, not this rust-colored spot. Just a spot on the primer gray area that needed a little more coverage. You know, coverage with THE SAME COLOR PAINT. Sigh. Guess John wasn't listening to his own lecture that he gave Tracy the day before. I believe it went something like, "All you have to do is check the paint on the nozzle to see what color is in the can. Don't forget to check before you paint..." Oh well. (Guess who had to paint over the rust-colored spot? That would be the one who actually listened to the lecture...)


Here's how things are coming along inside the cab. We're currently working on sanding down the steering column and will need to map out some wiring before we take apart the rest of the dash to paint. The primer is scaring out more spiders, but luckily they're dazed enough by the fumes to be easily squashed.

Tuesday, February 5, 2008

Boyd Coddington and Chip Foose ain't got nothing on us, except...

...talent, a budget that includes money, knowledge of cars, air tools (well, at least a little more than two screwdrivers and a pipe wrench), a paint booth, a paint gun, really good paint guys...(did we mention TALENT?)
We just have a paint chick. She has no prior experience, unless you count those bird cages she repainted back in high school...the birds weren't nearly as picky as John is... Nevertheless, with all John's hard work being exposed to the elements daily (you know, the usual oxygen, Arizona humidity, and don't forget those spiders), we decided that a few layers of primer protection were warranted inside the cab.
The dash is starting to shape up. If nothing else, a little gray primer sure cleans things up a bit.
Maybe it's just us, but we see a huge difference in the truck compared to 2 1/2 weeks ago. The front grill is driving Tracy crazy, though, so if anyone has any grand ideas, we're taking suggestions...
Ah...those famous white wall tires.... John is so in love with them that he wants them in every picture of the truck. We may have only worked on the inside of the cab today, but John still had Tracy roll the tire on out so we could see how it looked in this light. Wow, doesn't it make that primer pop? Oh, I guess he could have opened the door if he wanted to see the real difference. Or we could have just rolled out the tire and taken its picture on its own...

Saturday, February 2, 2008

Taking A Rest From The Grind.

John was at the doctor's this week with a double ear infection. When the doctor mentioned seeing some green stuff in there that didn't look good, we couldn't help but wonder whether it was '55 Studebaker paint? Hmm...decided that we'd better take a rest from sanding. An ARMrest, that is. John painted these over using a special car interior paint. They look brand new! It's pretty amazing.


We've decided that we'd stay true to the belief that the 1955 was commonly used as a work truck. Many ended us on a farm or being used in a trade that required some travel. Since John Deere green had already been vetoed, we chose to develop the look of our truck based on the trade we are most familiar with. Since most work trucks rarely stay in pristine, "just off the showroom floor" condition, this makes our job a little easier for now. It's okay for the old guy to look a little old (Take John, for example: Those wrinkles around the eyes give him that rugged, "vintage" look). That doesn't mean we don't reserve the right to eventually give him (the truck, that is) a complete overhaul and go back to step one... For now, the most paint he's getting is in the form of a plumbing company logo that will be painted on each door. After a little research, we decided that it was a little ridiculous to pay someone $125.00+ to create a stencil for us. Custom paint jobs were even worse. Wife labor is SO much cheaper (and comes with benefits!). Tracy got to work creating her own little masterpiece that John and she designed.

Freshly painted on the side of the truck door, this is the result. But it looks too new. We can't have new...


Sand on, sand off...John sanded the lettering out by hand to give it a more weathered appearance. Now it looks more authentic.

Not too bad for homemade! (For the record...$3.96 for the paint, $5.99 for the X-acto knife, $5.49 for the stencils, and $2.00 for the poster board. It was a pretty good investment). Should we be worried that Tracy was last seen with a copy of Pinstriping For Dummies?